The list runs from a painted porch board, which needs only tape or a stencil and a few cans of paint, to a Cricut-cut sign and a script metal piece that calls for proper cutting tools.
Your tools decide which one is yours: with a steady hand and no machine, paint a board; with a Cricut, cut the lettering; with neither, a hanging fabric banner needs only fabric and a needle.
1. DIY Welcome Porch Sign
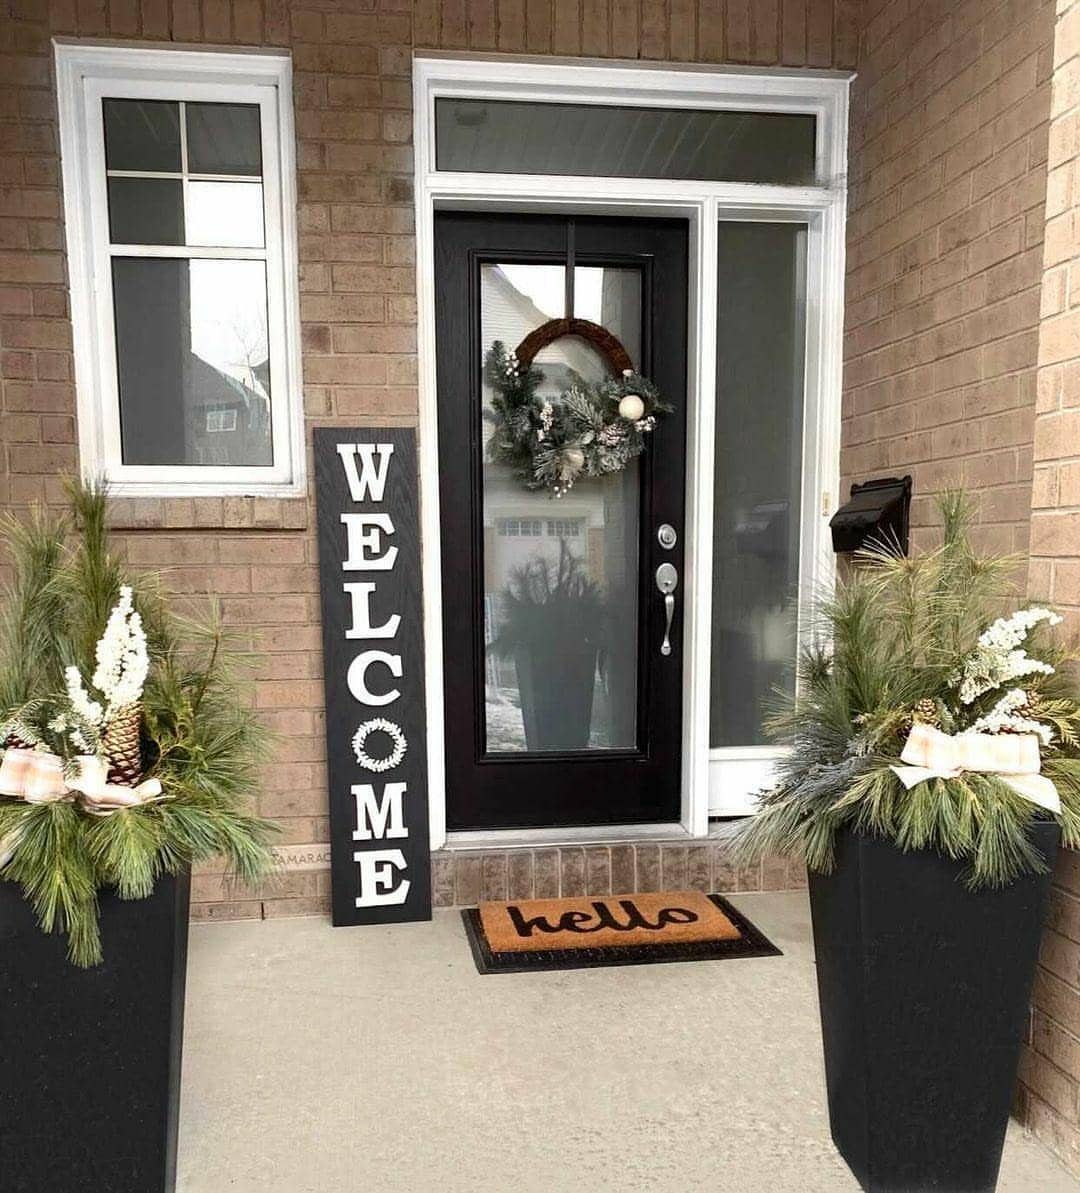
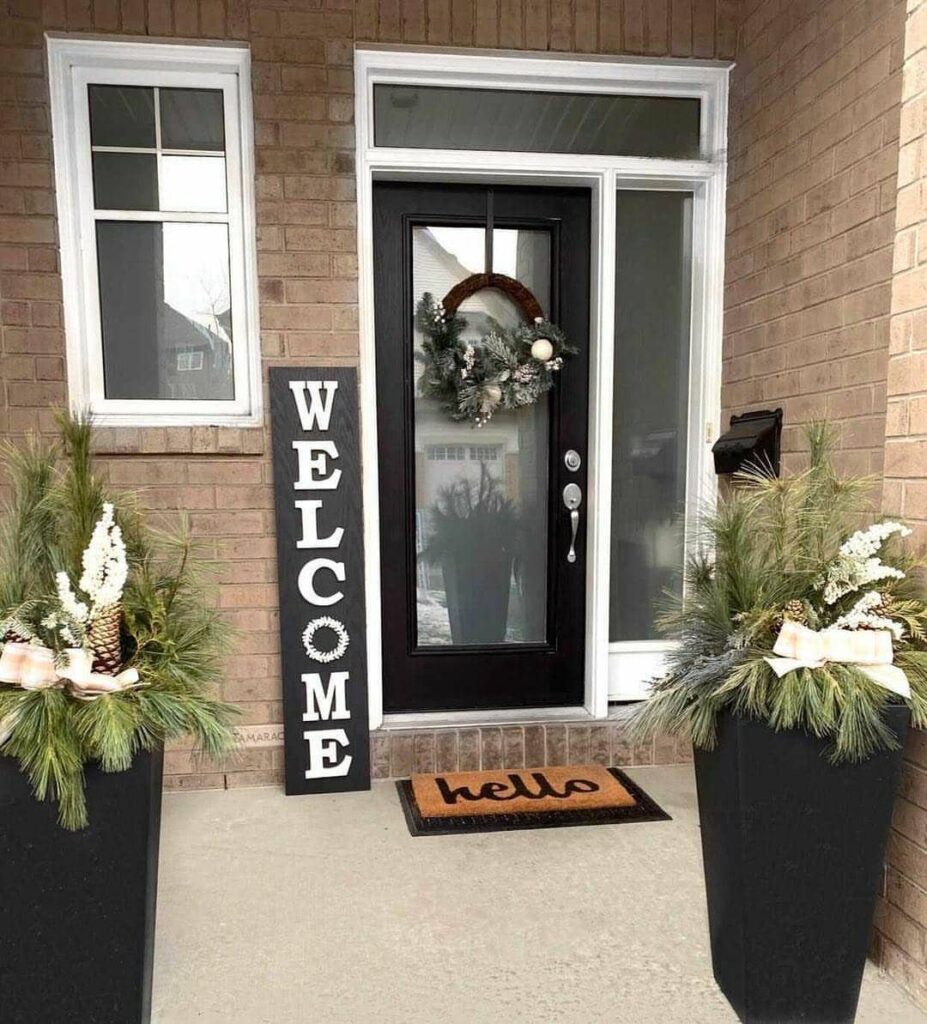
A single long board, stood upright, does the work of a whole entryway display. Black paint with white lettering reads clearly from the sidewalk, and the tall shape suits a narrow spot beside a door.
One word fits letters large enough to read from the street. Paint the board before you mark the letters, and use painter’s tape or a stencil for clean edges.
One of the best ways to make your home a more inviting place is with a welcome sign!
— Cricut
2. DIY Front Porch Welcome Sign
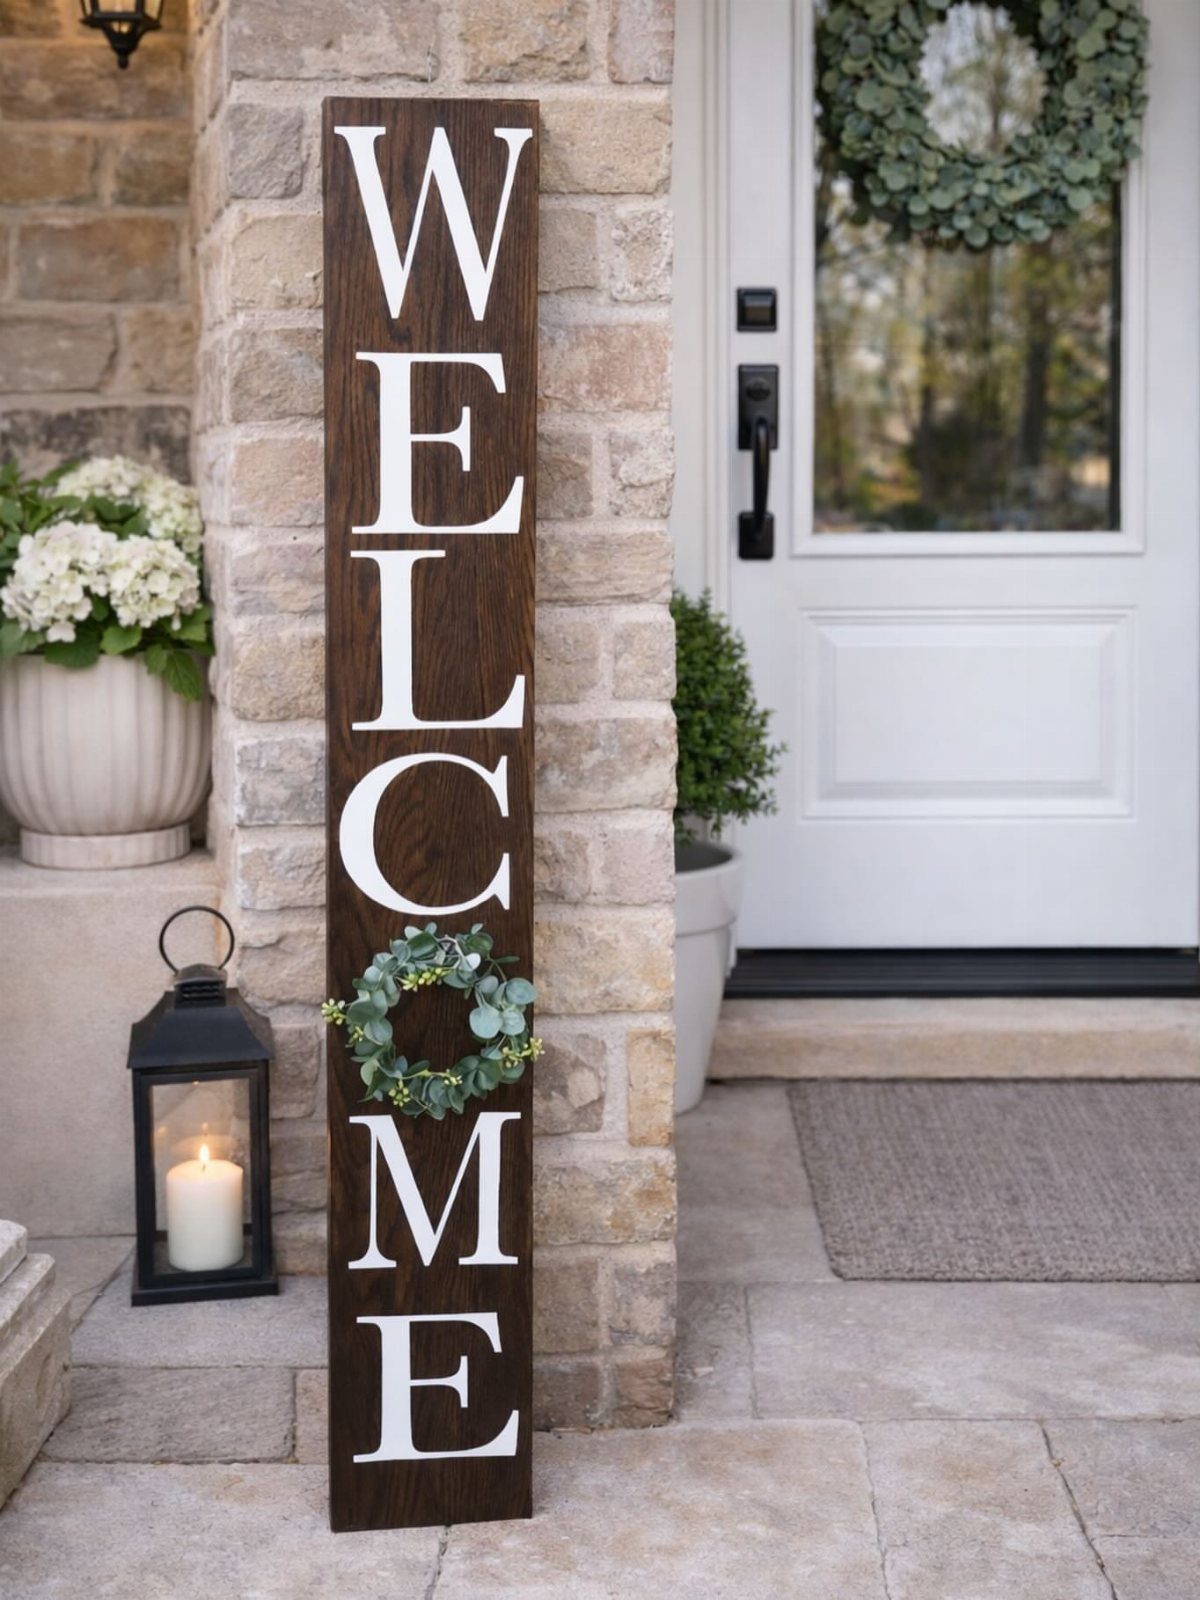
Acrylic letters on dark wood give a tall sign some depth, and I like that better than flat paint. A small wreath tucked over the "O" turns a plain board into something seasonal.
Craft shapes are cheap, so you can swap the wreath for another one as the months change. Stick with white letters on dark stain; the contrast is what makes it readable.
3. Custom Welcome Sign with Cricut
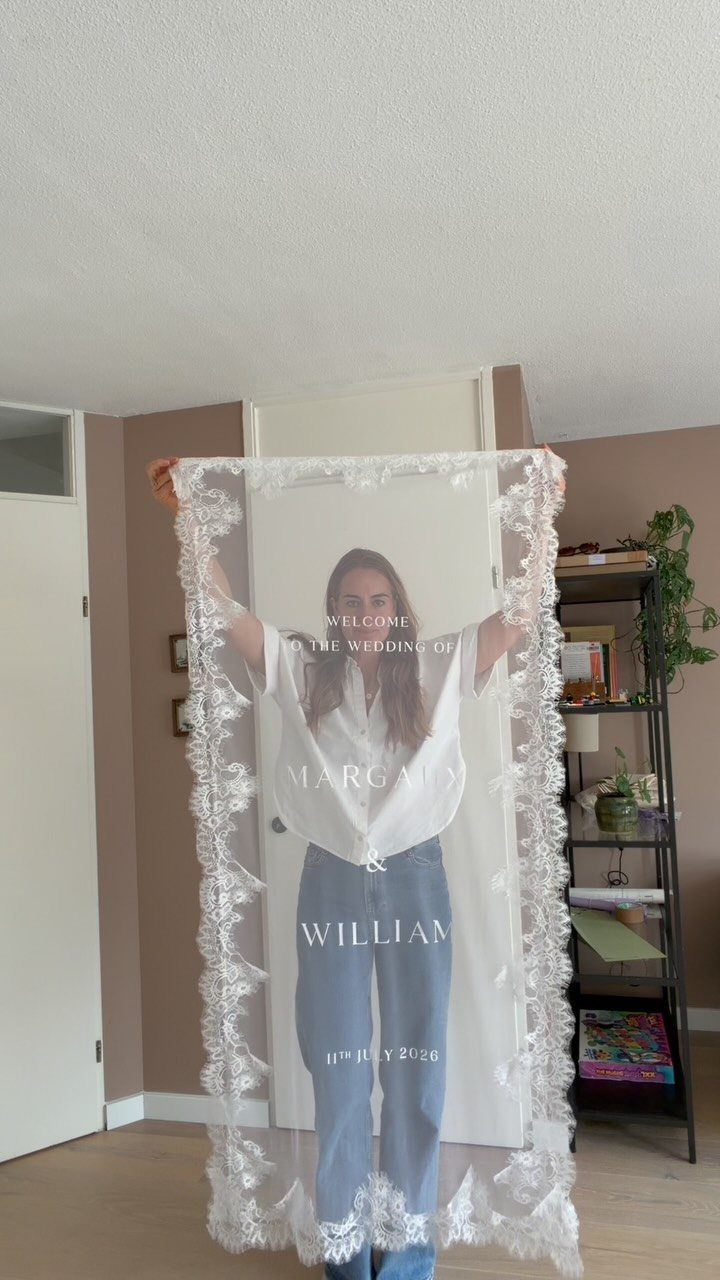
A Cricut cuts lettering with the kind of precision that steady hands rarely match, which matters most on clear acrylic, where every flaw shows. Names and a date, as on this wedding sign, are easy to change between files.
Lace trim adds softness along the borders. For a party, I would keep the wording short so the cut letters stay large and easy to read from a few feet away.
4. Round Two-Tone Wood Sign
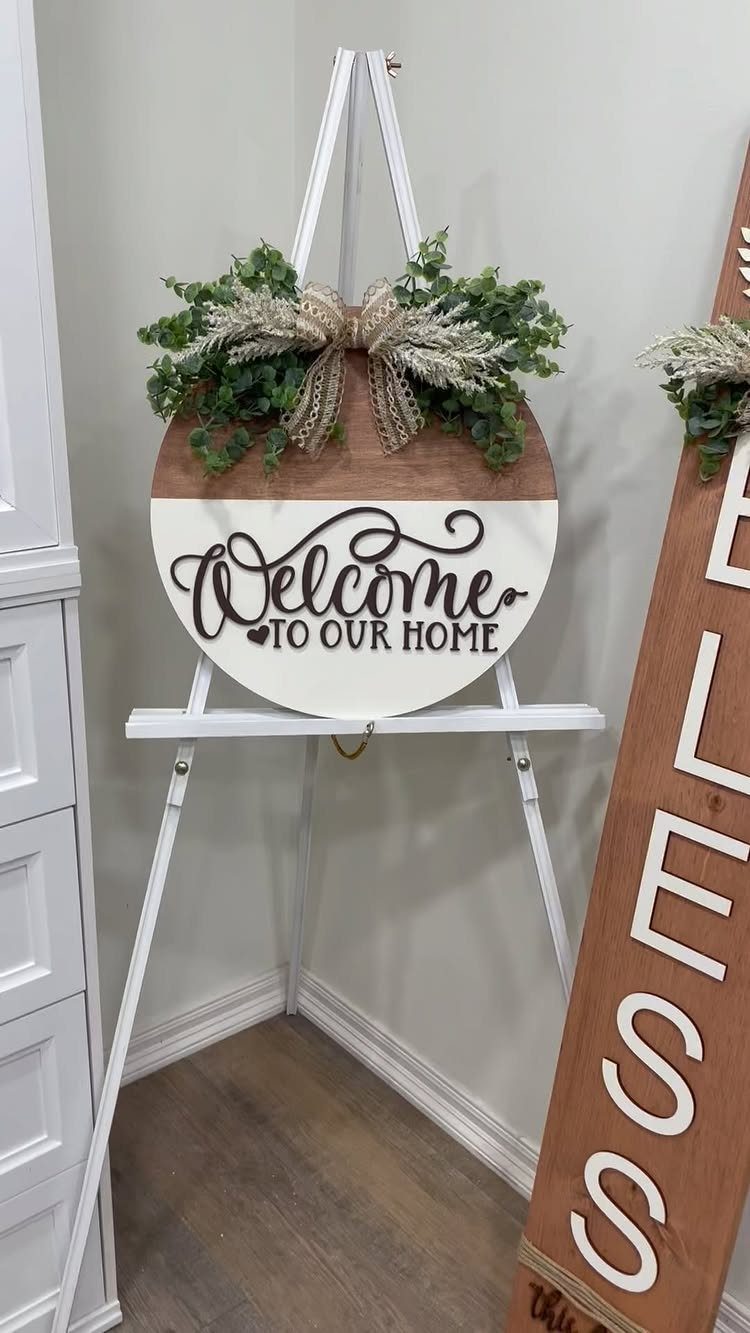
Split the circle between bare wood and white paint, and the grain does half the decorating for you. Tape off the dividing line before painting so the edge stays crisp.
Faux greenery and a bow finish it, and they stay put through every season. Display it on an easel indoors, or hang it on the door if you prefer.
5. Cutout Script Metal Sign

Script lettering with a butterfly cutout reads as a finished piece of wall decor, not just a greeting. Black metal looks sharp against a white wall.
Cutting metal takes proper tools, so I would buy a blank or a pre-cut sign if you don’t own them. The butterfly is the detail worth paying for.
6. Hanging Fabric Banner Sign
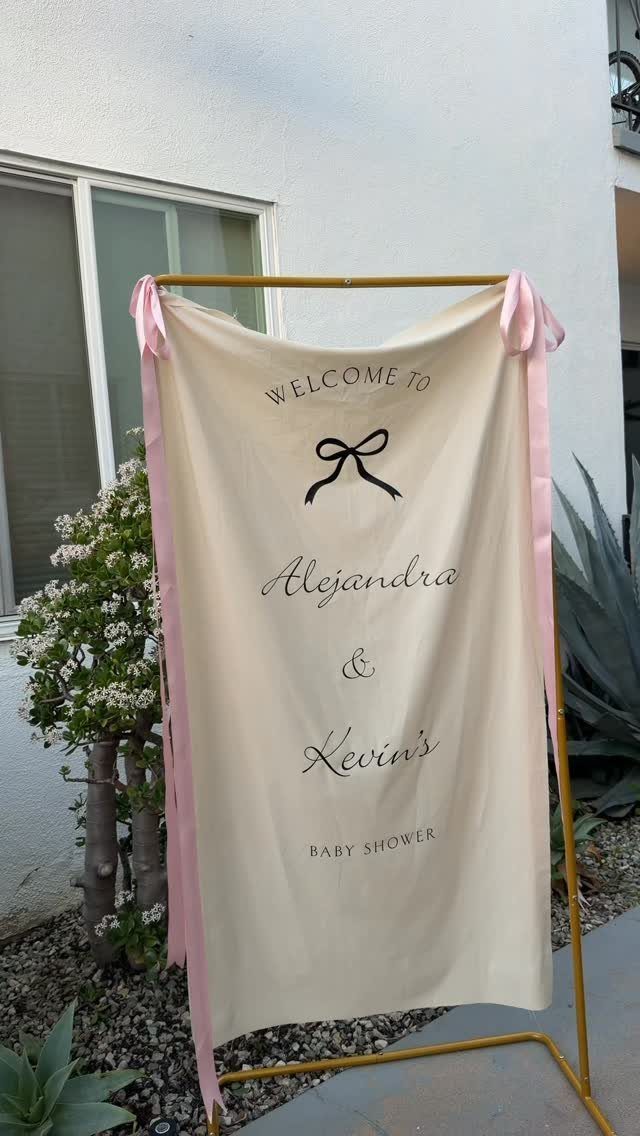
Fabric makes a welcome sign light, and a freestanding metal frame means you don’t have to hang anything from a wall. Tie the banner on with ribbons, and the bow can echo a baby shower theme.
Cream fabric on a gold frame stays neutral, so it suits plenty of party colors. Iron the banner flat before the guests arrive, because wrinkles show up in photos.
Finishing Touches for Signs
Sealer is the last step, and it protects everything under it. Polyurethane or an acrylic sealer both work; either one keeps the paint and the letters from wearing away.
Before you seal, fix mistakes. A paint pen is easier to control than an artist brush, so outline with it first, then fill in with a craft brush and craft paint or exterior paint.
Work from the far side of the board and trace toward yourself. Your hand never drags through wet lines that way.
If paint strays past the edge, wait for it to dry completely before covering the mistake with white. A rough board makes every line harder, so go slowly, or start with a smooth pine board.
For acrylic letters, paint the back side only. Mounted letters sit under the protection of whatever material backs them.
Using Stencils and Fonts
Printing your letters beats freehanding them, especially if your hand isn’t steady. Any font you like will work, so pick one you can read from a distance.
Gabriola is one option if you have Photoshop Elements. Lucida Handwriting ships with MS Word and reads as script without needing a download.
Size each letter to fill a full sheet when you print. That lets you slide the letters around on the board until the spacing looks right, so do a little math first to fit the word to your board’s width.
If you’re adding a vase or greenery at the top, start your lettering a few inches lower.
Transfer paper carries the letter shapes onto the surface in the exact spot you chose. Trace over each printed letter and the outline lands where you placed it, ready for the paint pen.
Frequently Asked Questions
How can I make a DIY wooden sign?
Paint a board in your base color, then print each letter at full-sheet size and slide the pieces around until the spacing looks right.
Print the lettering, slide a sheet of transfer paper beneath it, and trace over each letter so the shape lands on the wood.
A paint pen handles the outlines, craft paint fills them, and a coat of polyurethane or acrylic sealer protects the finished board. A smooth pine board makes the lines easier than a rough one.
Does Hobby Lobby sell welcome signs?
I can’t say what any one store stocks, so I won’t promise it.
What I can say is that craft shapes like wreaths are cheap, and a plain board with paint, a paint pen and transfer paper is all a sign needs.
If you want a metal script sign but lack the tools to cut metal, buy a blank or pre-cut piece.
Is 16×20 a good size for a welcome sign?
I can’t give you a firm yes or no on that size, because I haven’t got a rule for it.
For a word that fits your board, print every letter at full-page size, add up the widths, and adjust until the total sits inside the board’s edges.
How to keep a welcome sign from blowing away?
A tall board stood upright beside the door is one option, and a freestanding metal frame is another, since it means nothing hangs from a wall.
For a round wood sign, hang it on the door or set it on an easel indoors. I can’t vouch for any particular weighting method, so test the sign’s stability in the spot before guests arrive.